Manual Handling

It’s been a bit of a day of swinging around heavy items single-handedly. Which I would hesitate to suggest would be quite typical for the majority of woodworkers out there (the single-handedness). Our hobby/passion/obsession is pretty much an individual pursuit – it is rare to have someone else in the workshop with you while you work, and so if there is something heavy to move, “it’s all you baby”.

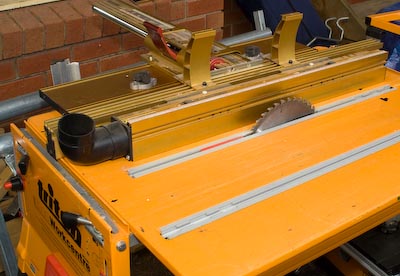
Today for example, I was mounting the wings on the new tablesaw, and each of those is a good 30 – 40kg. Not too bad to lift (carefully), but it is another matter entirely when you have to be dexterous with them at the same time. That takes a lot of extra effort. I was also hanging the shed doors today, and they are heavy – again 40+kg each, and again it was me, myself and I having to do all the lifting, manipulation and balancing while screwing the hinges home.

It was while carefully manipulating the doors into position that I was thinking of the whole manual handling issue. I’m also a Health and Safety Rep at work, and the stuff I do in the shed would have me issuing workplace reports left and right at work. So why do we tolerate practices at home that would not get a look in, in a commercial environment? In part, because it has to be – if we don’t move that sheet, lift that whatever, who will?

So to my point – it is a matter of working smarter to ensure that what we do in our workplace is sensible.

For example, when I’m working on a project that uses sheet goods (such as MDF), I typically will buy full sheets (2400x1200mm), as that is a lot more cost competitive. What I used to then do, was man-handle them down the back of the property, and swing them onto the tablesaw extension table to rip then down to the required sizes. It wasn’t a good practice, and as much as the bench could take having the sheet on it, it didn’t like how I got the sheet on there (and nor did my back).

So for my next project, I worked out a much more planned cutting list, with plenty of waste allowances, and then processed the sheets as I took them off the trailer. It might have been nothing more than cutting a sheet in half, but that was sufficient.

So give some consideration to your manual handling requirements – to the stock sizes you buy and how you process them. Get them cut down if possible at point of purchase if that is an option. When you have the stock at home, look at your storage issues, don’t store heavy items high etc.

If you need to, get a mate over, or a neighbour to help move something heavy around. It might cost you a beer or two, but it might not cost your back.

***Addendum***Dang, I completely forgot to mention, and as Robert correctly pointed out in the comments (thanks!) INFEED and OUTFEED support! Having some stands is absolutely invaluable.

You can get roller stands, but these have the disadvantage of tracking the material (ie, if they are not absolutely perpendicular to the direction of material travel, they can pull the material into, or away from the fence). There are ones with more of a ball roller which are omnidirectional which are good, and what I have are Triton Multistands

These are height, and angle adjustable, and have slip bars rather than rollers so they don’t track the material. In addition, they have a U section to the top with a clamp, so you can fit a length of 2×4 between two of them, providing side support for the length of the table.

In total, I have about 4 of these – infeed, outfeed and two for side support.***

The MagJig and the Incra Fence

I had an idea a while ago as soon as I saw the MagJig by MagSwitch – this has the potential to a problem that has perplexed me for ages. How do I get in incredible accuracy of the Incra LS Positioner fence on the Triton?

The problem was always fixing the fence down well enough to use the fence accurately, yet able to be removed easily, and without damaging the Triton top (ie drilling holes etc). Now that I also have a cast-iron cabinet saw, it also provided the perfect solution for using the Incra fence on that as well (and there is NO way I’m drilling holes into that top!!)

So off to the drill press, and a couple of 40mm diameter holes later, and the MagJigs inserted, we have a perfect solution.

MagJig by MagSwitch

The MagJig inserted through the mount that I use for the LS Positioner on the router table

MagJig by MagSwitch

The LS Positioner secured firmly to the tabletop. Now, to qualify the photo, I have removed the vertical panel support from the LS Positioner, but I have not removed the Wonderfence, which you certainly would before using the LS Positioner on the tablesaw.

Secondly, I would definitely use the Deluxe Aligner to ensure the fence was perfectly parallel with the blade (or more precisely with the mitre slot in the table.

The Deluxe Aligner is perfect for the task. (Obviously this is a photo from my file, and is not aligning the fence!!)

Finally, and one of the great things about the Incra LS Positioner is once it is set up and parallel to the blade, it is an absolute cinch to zero the fence to the blade, allowing extremely accurate cuts to be made. You’d definitely want to ensure an absolute minimum of blade runout, because the LS Positioner will give 1/1000th of an inch accuracy to your cuts!

And just to prove a point, here it is on the Triton, turning it into a precision machine!

Incra LS Positioner on Triton with MagSwitch

There will definitely be more posts / video on this in the future – the possibilities are too good not to explore this further. (Again, if this was actually about to be used, the Wonderfence would be removed leaving the straight fence only). Attaching a false (MDF) fence to that would then allow the blade to be partially buried in the fence for shaving cuts, or the use of a dado blade (but not on the Triton obviously!)

The MagSwitch and the Tablesaw

You know you are onto a good tool, when once you have it, you find that you can’t live without it! The next part of setting up the tablesaw was adding the cast iron wings. A friend of mine was very adamant that this is a two person job, and given the weight of the wings I would definitely agree with him.

However……I needed the wings on, and didn’t have a spare set of hands available, and the cast iron wings are HEAVY. The solution came very easily – what if I used the magnetic strength of the MagSquare (500lb of force) to help hold the top while I did up the bolts?

So that is what I tried, and it worked superbly.

MagSquare by MagSwitch on the tablesaw

I got the MagSquare overhanging the edge of the table, turned it on, then carefully lifted the wing into position. The MagSquare gripped the wing, and it was so strong I was able to completely ignore that end of the table and could concentrate on threading the bolt through at the other end.

***Update*** A suggestion from MagSwitch after reading this post was to turn the magnet 90 degrees to how you see it here – I chose this orientation thinking it would give maximum grip, but apparently the other orientation would have been even better, with the added benefit of the machined flat bottom of the MagSquare also helping to align the two surfaces.***

I still had to hold the outside edge of the table, and the magnet couldn’t resist the ‘bending moment’ (to use a term from my engineering past (hope I used it in the right context!!)) ie – the magnet supported the weight perfectly, but the outside edge of the table could drop away if I let it. If I had 2 MagSquares coupled together to form a bridge it would have been even better! However, the one was more than enough for the task.

There was only one drawback – the magnet is so strong when switched on, that when I was trying to thread the bolt into the hole directly under the magnet, it would keep pulling the bolt out of my hand! (And later, it would keep snatching the spanner away from me – no better than a 2 year old!)

MagSquare by MagSwitch

Here it is completely holding the front edge of the cast iron wing, with only a single bolt in the rear of the table so I could take the photo. Cool huh!

Carbatec Deluxe Alignment System

When you buy a new (major) tool, do you trust that it is assembled as accurately as it could possibly be, or would you rather be able to check it for yourself, and potentially fine tune it to the highest degree of accuracy?

To do so however requires more than just a square and a good eye. An alignment kit, and particularly one that incorporates a dial gauge (to measure deflection) is pretty much mandatory.

This kit from Carbatec costs $A169, and I’d suggest would be something you would factor into the price of a major purchase (as much as you would buy good blades for a tablesaw).

There seems little point having an expensive, accurate tool such as a tablesaw if it is not set up properly. There are a few of these types of tools on the market, and I haven’t as yet been able to do a comparison of them, but this kit specifically left me feeling very confident that my saw is now finely tuned and ready for action.

Deluxe Saw Alignment Kit

The kit comes with a number of parts (although one is missing from the photo), but there is one thing that is notably missing from the kit when you buy it – an instruction manual. I ended up heading to the website listed on the box, and found some instructions there, although they were not in a particularly good state. Definitely not in a format that could be printed easily, or written particularly well. They were sufficient for me to follow through the steps required to align the tablesaw. For what is meant to be a quality kit (and in use it seems to be), the omission of an instruction manual seems a bit unusual.

Putting that aside however, let’s look at the kit itself. It seems to be manufactured to a reasonable level of quality, but doesn’t go out of its way to ensure absolute precision angles (such as the support arm for the dial gauge (the very holey thing) to the mitre bar (the one with the two knobs). The focus of the kit seems to be primarily (and simply) to position the dial gauge. Other kits place a great deal of emphasis on the precision of each component, so you wonder if they are over-engineered, or this kit not enough. Again, let me go back to an earlier comment – I am quite confident that my saw is well aligned, so perhaps the relentless precision isn’t necessary. It might be important if you need to actually quote exact figures for the calibration, such as if you involved in calibrating machines for sale and having to quote their accuracy, (accurate to 1/1000th of an inch (all these kits seem to be imperial)), but when aligning the saw for ourselves, we only need relative accuracy.

The kit is not only used for tablesaws, but is useful for the other shop items – bandsaw, planer (setting blades, setting infeed table height etc), drill press etc (for example, there is a rod that fits the chuck of the drill press so you can do some of the runout tests by manually rotating the chuck with the tool fitted).

Deluxe Saw Alignment

The mitre bar has a couple of interesting grub screws to ensure there is no slack or slop in the bar. The end of the grub screws has spring-loaded ballbearings (yeah, I know that’s not the exact term), so they push on the far side of the mitre slot, keeping the bar snug. The support arm screws into that, and the dial gauge is connected on the end. In this case, the runout of the arbor is being checked. On my TS, runout was pretty much undetectable – in the region of 1 – 2/10000th of an inch

Deluxe Saw Alignment

Deluxe Saw Alignment

The rest of the tablesaw alignment is carried out with the Aligner set up as seen here, with the dial gauge touching the saw as close to the horizontal centre line of the blade as possible. The blade is retained on the saw with a clever system that I haven’t seen on other aligners. This unique method means that not only arbor runout can be checked, but also arbor flange squareness and blade runout. Once these are all checked, you are then in a position to check the actual table to blade (and therefore arbor) alignment.

My tablesaw showed a resulting runout caused by arbor flange squareness of 3 – 4/1000th inch. I probably would have preferred this to be a bit less than this, but it is below the 4-5/1000th that the online document mentions as approaching a point of concern.

The blades (and I checked a couple) had quite a significant amount of runout – I was surprised. Of course, if I wanted I could ensure that the blade runout was out of alignment with the arbor flange runout, effectively cancelling both out. What I might do with a bit more time is go through the process of marking the flange, and each blade so I can position the blade each time it is installed for optimum alignment.

Finally, by choosing a specific saw tooth, I zeroed the dial gauge when it was touching the front of the blade, then moved it to the rear of the blade. I then rotated the blade so the same tooth was at the rear and rechecked the deflection. With subtle touches with a rubber mallet I was able to get the tabletop positioned so there was no discernible deflection between the front and rear positions. (However, it took a bit longer than expected as I was trying to follow the instructions closely, until I realised they were erroneous). Once there was no deflection, I tightened down the bolts holding the table, resulting in a tablesaw ready for some precision work