The finish line

It started off modestly. A few posts here, a few jokes there, some news, some videos, and slowly it grew.

From a walk to a run to a gallop, then as competing pressures came to bear it has dropped back to a quieter place.  But still, we got there.

Stu’s Shed is officially 10 years old today.

Some Stats

Because I like stats.

Total views: 3,207,017
Total unique visitors: 691,972
Total posts: 3042

Screen Shot 2017-06-20 at 9.52.18 AM

And as I like to quote, those views do not count other platforms, so the rough estimate would be around 5 million views of the content.

Videos: Well, I’ve completely lost track of this number, having changed hosting platforms and a bunch of other issues for tracking.  There are over 200 videos, and people have heard me say “G’day, welcome to Stu’s Shed” over a million times.  One video on YouTube alone has been seen 256,296 times.

Humble Beginnings

Using the Wayback Machine, I found a very early post to see what the site looked like back then.  Even I had forgotten!  Not sure if I recognise the person in the heading either any more!

Screen Shot 2017-06-20 at 10.08.20 AM

Back then I was still running woodworking courses on the weekend at Holmesglen Tafe, and going to the Triton Woodworkers Club that I had previously been the President of.  The website I built for them is long gone now, but the Wayback Machine still has snapshots on file.
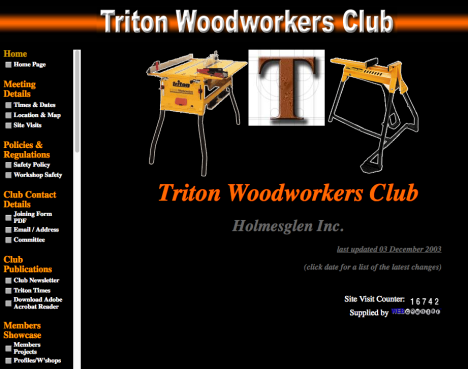
Screen Shot 2017-06-20 at 10.18.44 AM

Anyone remember back that far?

Stu’s Shed went through a number of changes over the years, refinements rather than drastic changes.

Screen Shot 2017-06-20 at 10.21.53 AM

The Physical Shed

The shed itself has also undergone constant change over the years too.  It started out as a 3m x 3m, that I crammed in a Triton Workcentre, router table, and a lathe.  Don’t even have a photo from inside back that far.

aold-1.jpeg

The next iteration was the addition of a 6×3 shed, which was a massive improvement.

That lasted a while until a gusty day saw half of it deposited over the neighbour’s fence

sheddestructs-1.jpeg

It was repaired and lasted a few more years, until finally an expansion was again required.

pict7515.jpeg

This photo is during the build, and the shed grew to become an 8m x 4m.  Again, the luxury of so much space.  At the time!  It took a few more years, but I outgrew that one too.

3old-2.jpeg

It was then that we decided to move house, so a brand new shed was on the cards.  It took 12 months of operating in the garage of the new house, but finally version 4 of Stu’s Shed was built.

shed-1.jpeg

shed-2.jpeg

Inside, it keeps going through changes, but that is still how it looks in general.  The door fell off the other day (hinges gave up), and the floor inside is thick with sawdust, but it is still working.  I still haven’t finished unpacking from the last move!

20140223-082850

I don’t even remember when the inside of the shed looked this clean, and lacking clutter!  Sigh.

So I guess that it is for this retrospective.  10 years of blogging on Stu’s Shed.

Where to from here, I have no idea.  But if you hang around and check in occasionally, no doubt you’ll get to hear and see when I do know!  In the meantime, I’ll still post when I can, and when there is something to discuss.  Things sure have changed in the blogosphere over the last 10 years too.  There were only 3 of us running woodworking blogs back then.  Now there are 1000s.  And in my small way, I might have played a part in that too.

Thanks for the last 10 years of sharing this adventure.  And let’s see what there is to come next!

OzToymaker

While much of my previous shed activities have been on hold for quite some time, the amount of sawdust being generated in the shed has never been greater.

The woodworking that I am doing isn’t rocket science, or challenging, but that doesn’t mean I’m not enjoying it even so.  Life is so busy at the moment, that if it wasn’t for what I am getting to do on the CNC, I wouldn’t be doing anything at all, sad as that sounds.

Not that I am saying that working on, or with a CNC is anything less than other methods, it is just different.  And when you are so critically time poor, it can be the only option.

I guess too that I got so much grief from readers when I did talk about CNC, that I just stopped talking. Writing is a habit.  Once that is gone, it is really hard to pick it up again. Especially when you are critically time poor.

In any case, here is a small selection of the sort of things I have been making.  Nothing sophisticated, a bit of fun and I do enjoy the designing.  And no, I can’t take any credit for the painting.


Trailer part 2

Couldn’t bring myself to buy a Chinese made trailer – just wrong on so many levels.  Not the least of which because there was no mention at all that the majority were not locally made, while those that were had it plastered all over, giving the strong impression all were.

So.

I contacted J.S.T. Trailers in Dandenong after a recommendation from a family member (plus I knew their trailer was a well made, solid thing).  And they had just what I wanted sitting there, ready to go.

8×5 dual axle, hydraulic brakes and cage, and even better, saved me almost $800!

And made by them cut by cut, weld by weld onsite, not shipped from a factory half a world away.

Photo 11-5-17, 07 59 18.jpg

Ok, so I am excited about a trailer.  Looking forward to making use of it (especially if you see what I was using – an old 6×4 that I got 2nd hand for when I was doing Triton demos at Bunnings).  Having one with a good capacity is going to make everything just that much easier.

An Aussie Trailer

I have an old trailer that has seen better days (and a fair few of them), and am at the point that I am seriously considering upgrading.

I know what I am interested in (with some flexibility) – 8×5 to 9×5 galvanised, 300 or 400mm sides, 800-1000mm high removable flat storing cage, dual axle, possibly hydraulic brakes (if not too cost prohibitive), otherwise standard cable brakes.  I want to be able to carry a full 2440 x 1220 sheet in the bed of the trailer, and slide it out (rather than lift it over the tailgate opening).

Thought I had found what I was looking for too – a company promoting itself as an Australian manufacturer, and all their trailers that are on their home page (continually changing images) all promote that they are built in Australia, and built tough for Australia.  Cool.

So there was a delay in getting the trailer I was after – they didn’t have any of the size I wanted ready to go.  No problem – after all, when they make some more, weld them up, get them galvanised, then I should be ready.

Got the phone call today – trailers are now back in stock – new shipment arrived.

Shipment? Uh, what shipment?  Of the trailers of course. Turns out that only a few of the range are made here (custom builds, self tippers), the rest are imported, already made.  From f****ing China.  WTF.

If I wanted the same thing made here, it would cost about 50% more.

Not sure if it is a deal-breaker for me, but it has significantly dampened my enthusiasm.  Anyone know of a decent trailer manufacturer (IN AUSTRALIA) that makes, rather than imports trailers?


Time Out

This has been unquestionably the longest break, or gap between posts on this site in the (almost) decade it has been running.  Large combination of factors has lead to it, and it has been useful.  At the same time, I’ve also taken a break from writing magazine articles as well, and the latest issue of The Shed magazine is the first one in about 3 years that didn’t have one of my articles in it.

Had a lot of shed time in the period, but little in the way of woodworking.  It has mainly been production work on the CNC, and that offers its own challenges, and rewards.  The shed is quite the bombsite, so I’ve started a mission to clean it up.  Progress is slow!  I’ve given up trying to suck up the dust, and have resorted to using a shovel.  And yes, I wear a powered dust mask for that operation.

But as I mentioned, progress has been very slow.  Especially as I’m generating as much new dust as I am removing!

It isn’t all roses, letting the space get too messy.  The area around the tablesaw got somewhat compromised, and that was pointed out to me in spades when I was feeding a smallish (1000 x 600 or so) piece of 3mm MDF.  I got it a little offline, and the saw grabbed it as fast as anything and spun it backwards into me.


Took about a week for it to start to fade.

I want to say onward & upward, but I did find myself in the A&E a couple of days ago, after dropping a full sheet of 12mm MDF off the car roof rack, and having it slide wide and land directly (fully) on my foot.  While I was wearing steel capped boots, it missed that, and caught the middle of the foot.  While I was pretty sure something must have broken (the swelling was immediate, and impressive), the x-ray showed otherwise.  Lucky.


Pretty much has sold me on the concept of getting a new trailer, and one capable of holding a full sheet.

On a final note, came across this old ad for WD40

Enjoy!

Do you want to buy a Torque Workcentre?

It doesn’t have the same ring as “Do you want to build a snowman?” so it is one of those ones that sounded better in my mind than on the page!

However, yes, I do have a Torque Workcentre (TWC) that I am looking to find a new owner for.  While it proved to be an incredible platform when I got it, my needs have changed quite significantly over the past few years and while it could be useful in the future (and I’ll probably lament its departure), at the moment I need the space it occupies for a new machine that it will help finance.

To give you some details, it is:

  • 2.5m long Torque Workcentre, which comes with both a 900mm and a 1300mm arm.
  • It has two circular saw mounts – one of the original style, and one that can rotate from crosscut to rip without remounting (rotating mount)
  • Copy attachment
  • Both a Triton router attachment as well as the generic router attachment plates
  • Dust guard
  • A drill attachment, and a prototype of the sander attachment
  • A prototype chainsaw attachment
  • and lots of additional bits n pieces – additional stops, extra support arms, copy pins etc

Total new price for everything is $6000.  I am asking $4000The photos don’t show the vertical support arm, of which I have two.  There is also an extra carriage for the arm (without the vertical plunge), so an extra tool (such as a mitre saw) could potentially be added.The MDF top is not supplied with the machine new, so while it is in well-used condition, it can be easily replaced when necessary.Viewings are welcome if you are local enough, and I can take other photos if requested.The drill press in the background is also for sale, as it is no longer functioning (burnt out motor).  I’d be happy to throw it in with the TWC if you are quick enough!

Update on the Kreg Plug Cutter

Have checked with Carbatec, and the Kreg plug cutter is expected to be in stock by the end of March.

Cost will be $119, and product code KR-KPCS.

I have used pocketholes on a number of occasions (can be a very useful tool), so am definitely interested in the ability to make my own plugs from the same timber that I am using, rather than purchasing ready made ones in a limited stock range.

Shagged the Thread

Had a bit of a problem last night, where the collet on the CNC router went on smoothly, but after a cutting job, it had jammed on solidly.  I suspect the collet was slightly oversized (or heated up more than the threaded shaft) and slipped a thread, causing a cross-threaded situation.

In any case, what it meant that once I managed to get the collet off, the thread on the router shaft was shagged.  Badly.

Crap.

In hindsight, if I had known it was going to be that bad, I would have been better off grinding a gouge in the collet, and used a nut cracker to snap the collet in two to remove it.  Hindsight is so 20:20


In any case, I now had a threaded shaft that nothing could be screwed onto.  I went shopping around for a die (as in a tap & die), but finding one that was 25mm proved a bit tricky.  Tried Total Tools, but not only did they not have anything close to the size I needed, but the guy serving me didn’t even know how to use a digital caliper.  How can you work in a tool shop, and not be able to use such a fundamental tool?

I ended up having a chat with one of the fitters in the mechanical workshop at work, and while they didn’t have an odd shaped die, they were able to lend me a thread file, and some lapping paste.


The thread file worked a treat, getting the thread to the point that I could get a collet threaded on.  Still bloody tight.  But what really fixed things up was the second stage, adding some lapping paste to the threads, and running the collet on and off the shaft.  And it worked.  After an hour or so of threading it on and off, cleaning, filing, I had the thread back to being about as smooth as it was, if not better.

The thread has been damaged a bit from the experience, but at least I have been able to recover it enough to be operational again.

Ever heard of a polissoir?

No, me neither!  Although in saying that, it was probably referred to in the bible for finishing: A Polishers Handbook, by Neil Ellis.  If you haven’t read or come across this before, it is well work the small investment. You can order it here.

And no, there is nothing behind that endorsement, other than it being highly recommended, and essential reading matter.

In saying that, seeing as there is a new edition (much newer than my current copy), and I don’t remember whether polissoirs are mentioned, it might be time for me to be reacquainted with it as well.

front cover 25%.jpeg

back cover 25%.jpeg

Anyway, back to the polissior.

It is an 18th century tool (if not from even earlier) for applying, abrading and polishing a wax finish.  Simply made from a tightly bound bundle of organic material (such as straw), it is then dipped in molten wax to charge it up, and then (once cooled) rubbed over the surface of the timber.

Polissoirs_001_adj.jpgThe polissior both burnishes the surface, and applies the wax, driving it into the pores (where open grain timber is used).

The excess wax is removed, either with a wooden scraper (or the other end of the polissior), then the surface buffed with a cloth.

There are a few on the market, such as the one pictured above from Skagit BroomWorks and Henry Eckert Fine Tools have a version as well.

One chapter ends, another begins

Long time friend and woodworking show personality David Eckert has decided to move on from the Henry Eckert Fine Tools company.

For those who are less sure of what that company is, let’s just say that they probably have a drool-cleaning budget at the wood shows, as they sell the Lie Nielsen range of handplanes etc (and have featured on here a number of times, again, complete with drool.

wwws-10.jpeg

So it isn’t all bad news – Henry Eckert Tool Works is now being run by one of their previously (obviously passionate) clients, so they will still be at the wood shows, still with the same sort of product lines.

In the meantime, David has another tool business, to slowly develop some Australian made products (among other product lines), which you can find here: The Toolworks

So while faces will move about, the products we know and desire are still available, and hopefully even more will become available through David’s newer project!